• Long Island C420 project in 1/8th scale

  • Discussion of the past and present operations of the Long Island Rail Road.
Discussion of the past and present operations of the Long Island Rail Road.

Moderator: Liquidcamphor

  by 452 Card
 
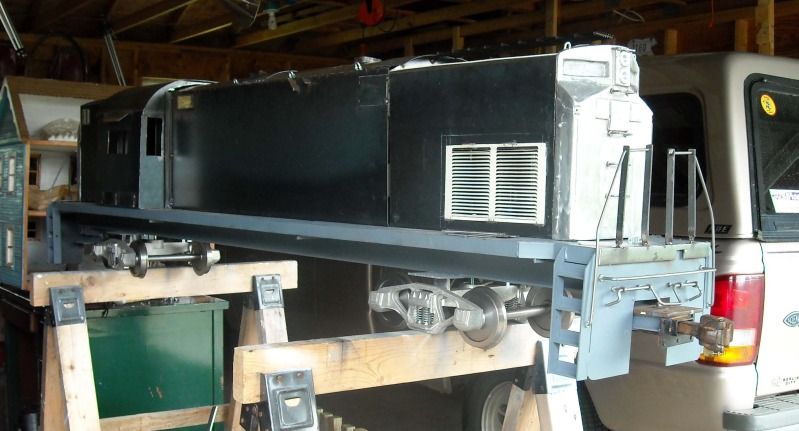
I know that you are still in the building stage, but I have an engineering question to ask for future consideration: With the motors you will use as traction motors, is it possible to build-in a regenerative braking feature to slow the unit? With the weight of the engine around 500 lbs., converse all-stars will be shredded in an hour! Real LIRR MU equipment uses that feature in addition to modulated friction brake down to around 15 mph, at which point the air brake system assumes control. If the braking rates/speeds could be reduced to 1/8 scale, this might be a way to better control the unit until "feets time" takes over. A computer cooling fan might fit in the hood to provide actual cooling of a small radiator, such as a car heater core. Just an idea.
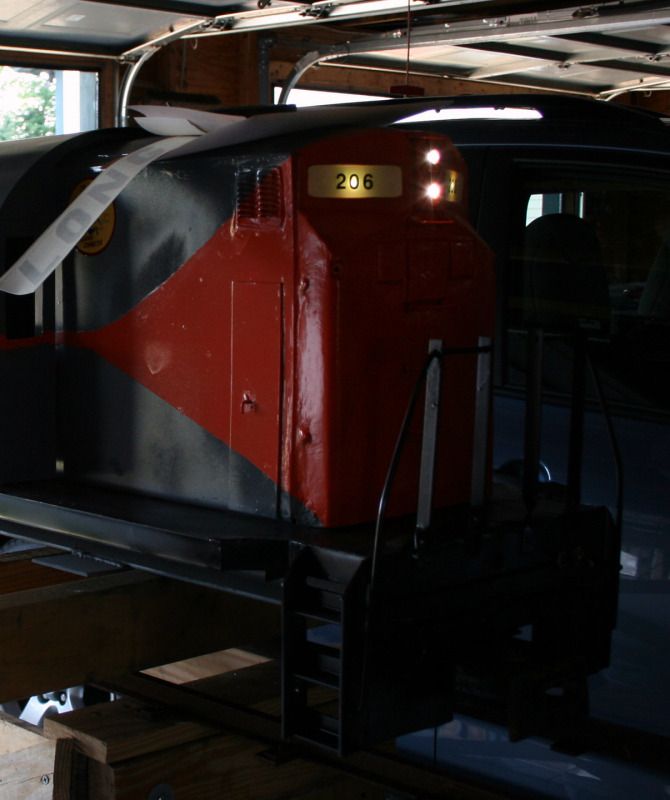
  by RGlueck
 
Okay, Here I have to say, my expertise on dynamic braking is not very good. I know of other "live Diesel" guys who use just what you're talking about to slow locomotives. In this case, the electric motors are constantly engaged, so there is never a time of "free drift", coasting, rolling, whatever you want to call it. WhenI choose to speed up, the motors go faster, and slower when I wish to slow down. There is a controlling computer inside that handles power distribution, etc., and I will have a heat sink radiator, like one finds on a home computer, to cool it. There is a 24 volt muffin fan installed in the front of the locomotive to force and air flow.

Just to bring the project forward a bit, I have cut the cab base down about 5/8", so it sets at the correct height on the body. The front radiator louvers came from a discarded air conditioner I found at the dump (nice selection of used appliances to choose from, btw). Still waiting on the trucks, but I hope to begin fabricating the faux fuel tank. This will either hold the batteries or other necessities.

I'll try to get a new picture up soon.
  by RGlueck
 
Update on my locomotive.
Image
Front grill has been added, salvaged from an old a/c unit at the dump. Not exactly prototypical, but it works. There is a 24v muffin fan inside the hood, as well.
Image
Opposite side view.
Image
From the rear.
Image
Note the cab shade and smoke lifters have been added.

I am adding the hood cabinet doors next, some pins to facilitate removing the hood, and a faux fuel tank.
I have the electronics for motivation figured out and ready, but still am looking for 5" Diesel wheels I can afford.
Hopefully, am update during the next week. Thank you for looking and your comments.
  by Crabman1130
 
It's looking good. I enjoy the updates. Thanks for sharing.
  by RGlueck
 
I have added the forward section cabinet doors to the best of my ability. There are some details that will get added after I complete major "blocks" of body work. I put gray primer over bare steel after washing it down with orange cleaner to remove flux, grease and steel yard oil.
I have come to better appreciate what autobody repair guys do for a living, too. Okay, major progress to this date is the cosmetic addition of hood doors and the shortening of the front and rear steps. I had noticed the steps looked to be as tall as the hood itself and this was going to have to be worked on. A friend pointed it out as well. Having checked the drawings from which I calculated the measurements, it turns out the end views are slightly larger than the side views! Ho ho ho! Very funny joke! I remeasured and removed 2 inches of excess length! Well, she looks better in my eyes and hopefully will pass muster. Rivet counters will find a number of detail issues, one of which is the radiator shutters, which should be in three panel sections. Well, they aren't, and that's just the way it is on this locomotive.
Image

Image
  by RGlueck
 
First side in World's Fair paint as delivered in 1964.
Okay a few spots and pulls from the tape, but as of today the headlights, number boards, and markers are wired in and work. These came from Oznium.Com, which I recommend. I will wait to put the fuel tank on until the trucks are completed. Wheels are being supplied by Stephenson Machine Shop. The truck bolsters need recasting to accommodate the electric motors in the most efficient manner. Lettering will come from Bangor Neon, here in Bangor, Maine. "Dashing Dan" heralds are here, and in the correct scale, too! I need to build the battery box cab steps as well.
Will she run this year? That is still a big question, since as a novice locomotive builder, my experience and resources often diverge from what I want to do today. Probably the next big construction on this end will be a stand on wheels. I need the saw horses for a vegetable stand by the road!

Image
Image
Image
Image
Image

Hope she meets everyone's approval.

-Dick
  by MACTRAXX
 
RG: I really like the orange and gray colors...
The only thing I notice is the helvetica numerals on the number boards...
The numerals that were used in the 60s were noticeably different...
Just curious...Why did you choose #206?
Was that your favorite LIRR ALCO C420?
This is quite a "scratch built" model here!

MACTRAXX
  by RGlueck
 
MACTRAXX- I was torn between several C420's for the model. 215 was the first to be badly damaged in a wreck at Bridgehampton, and good friend of mine was the Engineer on that run. 221 was the last of that fleet, and she's preserved, albeit, in Mexico. 206 was an old friend, and for whatever reason, wherever I traveled on the Island, she'd show up. Sadly, 206 is only a memory today, so I thought I'd memorialize her as a model. I have her as an H-O brass model as well.
As far as the number boards go, the font and size look good compared to my pictures. What I was torn about was doing them as in service life, or going with the white numerals on a black background as delivered. Since they are illuminated boards, I went for effect. Plenty of details to still go after, like window glazing and extended side windshields. Then the steam generator exhaust port. I am also thinking of adding a streak of exhaust grime on the hood roof when she's completed.
I am told by a retired engineer, the C420's were not fun to run. The cabs filled with exhaust once the windows were opened and they were hard riding. The FM's were far more comfortable to run and could dig in and run. Still, I think the Century series of ALCO's were some of the best looking locomotives to ever grace the rails after Dieselization.

I'll paint the Engineer's side next and get her decaled with name and herald, then post again.

I love to read the comments, guys.
  by baileyjet2000
 
Looks great. Look forward to the next installment.

All the best

Ray J in RSW
  by hotbike
 
Are you going to put one motor on each truck? or two on each truck? I thought you said you had three motors, but I'm thinking it would be odd to have one truck with two motors and only one on the other? Or do you need a fourth motor?

Sorry to hear you need to recast the bolsters.

But I'm assuming you will use one motor on each truck and save the third motor as a spare?
  by RGlueck
 
The motors are about 4" in diameter. Originally, we had cast the trucks exactly as ALCO had them,to allow for all directions of motion and, well, purity of the model. Because our speeds will never come close to prototype speeds, the free travel of the floating truck is not required. The real trucks accommodate traction motors underneath, whereas the motors I am using are "over-scale". Each truck will have a single motor gear and chain driven to both axles. That will be sufficient to allow her to pull a good train with eight wheels under power. The motor mounts are to be cast into the bolster. I am keeping the original truck molds in the event somebody wants to try building one ala' the real deal. Smaller motors could easily be mounted to each axles in that case, and the drive would be amazing.

Allow me to add, all the parts I made and cast for this project are available as castings for sale, from www.oddduckfoundry.com , of Orrington, Maine. That includes the ALCO front and all truck parts. If you know large scale hobbyists or just need one in the living room (and who doesn't?) you can go directly to ODF for parts.
  by RGlueck
 
August 02, and I'm afraid she won't get to run this season. I need the trucks completed and get the motors installed, plus the correct wheels, axles, and gearing. I shouldn't complain as I am relying on a number of friends to help me, and each has his own life!
Here you see, and probably can barely make out, the headlights, number boards, and marker lights, illuminated by LED's from Oznium.com . These are 12 volt LED's, pre-wired with resistors in line and covered. Here they are wired to a double pole-double throw switch, to control lights in either direction. Also wired in are two cooling fans.
The lettering is also on hand, but I've not applied it as of yet, since more internal work is required, and I 'd rather not scratch the decals.
One other change is that it is sitting on a newly constructed mobile work station, rather than saw horses. Hopefully the saw horses will be hold produce for sale at the end of the driveway!

Image
Image
Image

Try to note the color of the markers is red.

Image
Image

The short hood does not have markers wired in, but does bear illuminated number boards and headlights.

Image
  • 1
  • 2
  • 3
  • 4
  • 5
  • 10