Mirai Zikasu wrote:
Sounds like fun. Since I never had a scale ruler, I've mostly been working with reference points as the overhead parts seem to line up quite well with details on the locomotive. The only think I ran into trouble with was the resistor grids with pantograph placement. I've been planning on using the Bachmann Acela pantographs since they actually represent the modern Brecknell Willis design rather than Atlas's which are of the original style of the AEM-7s...but the way that they installed the springs means I had to move the resistor grids over a few millimeters so that they wouldn't whack into each other. (Always a bloody problem with something!)
You should invest in a scale ruler, it helps you keep track of your measurements.
I do have a solution for the pantograph problem. You can adapt the Bachmann Acela pantograph to work the Atlas Pantograph base. The advantages here are obvious. The base would need no modification, except for a new stabilizer bar to fit the Acela pantograph.
Most of the modification would revolved around removing the hold pantograph arm (I haven't figured a way to remove it intact yet), and then adapting the lower arm of the Acela pantograph to fit in it's place. Since its essentially a sheet of metal at the very bottom, this isn't a problem
Basically, you'd need clip off the old spring "hooks", and replace them with thinner ones to interface with the Atlas pantograph springs, and you'd need to find some brass wire and solder it onto the the under surface of the lower arm to fit in the Atlas base's hinges. Finally, you'd hook up the new equalizer bar, which pretty much means just replacing the current one with a fresh piece of wire.
In theory, it should fold and extend like normal, as well as lock down as it would on the Acela pan, since the locking piece is part of the lower arm. since the lower arm is thinner than the Atlas lower arm, you shouldn't have to worry about the original locking wires catching it.

With some fitting, the bachmann pan should be able to be installed in place of the atlas one.

Since it is flat metal, you can easily solder or glue a wire or rod for it to swivel with. You can replace the metal thingies with wire that better match the atlas springs

The stabilizer bar is actually installed on a separate part of the base that can be unscrewed from the bottom. It looks like the stabilizer bar can be removed without damage to it. i'm not sure how remove the lower arm though.

I know. That's why I'm getting my bum in gear to get my own finished. I need another set of Phase V decals though for the numberboards since I decided to renumber mine from my first choice engine and a few more logos since a Phase V AEM-7 needs two sheets' worth of medium-sized Amtrak logos. As far as the ditch lights go, I used two sets of Details West DL-229s, but know that these are a bit oversized. My best advice is to line up the top, outward corner with the holes for the handrails on the side and the innermost corner of the marker light cavity, and then drill/shape from there. I actually messed up when I did this the first time as I cut way too far to the center of the nose, but it's nothing a little putty and styrene can't fix. It's still a little noticeable where I cut and refilled, but at this point I'm not willing to strip the paint and redo it. (I actually messed up my E-60MA body 603 when the perfectionist bug bit last, and need to repaint and decal the sides again. Ugh...) Also, consider putting a little piece of .015" or .020" styrene on the inner side of the openings to act as a little buffer when you glue the ditch light casings in to keep them straight.
That would be cool if you could set me up with the appropriate decals also. If you still want to stick with 914, i would change mine (since its obviously currently an AEM7 AC, and I'm not going to rebuild a painted unit).
Yeah, i already lined up my ditch lights like that, using my scale ruler and a Phase III model to line it up additionally. Are there smaller ditch light castings, or is that just what you had available to you? I was hoping if i could find a ditch light casting, that it might let me fit it in just right so i knew where to cut.
You probably wouldn't need to strip the model, but if you use some fine grit sand paper, You can smooth it down enough that it doesn't show once you give it a quick once over with an air brush. For the most part, i was able to plug up the holes on my Silverliner IIIs this way (though it looks like i didn't fill in one pair all the way, but whatever, i know from my other car that it can be done).
here is my lines for drilling

That sounds like a good idea. I was going to leave mine hollow, but a backing behind the mesh sounds like a good idea to feign the depth. (Though, with the superfine mesh I have--intended for mask making!--I don't know if it'll be possible to see through once it's installed and painted. Regardless, when I made my first electric boxes, I wasn't able to cut the pieces nicely, and ended up using so much putty and doing so much filing and sanding that I just said, "Screw this; I'm remaking the things." Here is a link showing pictures that contrasting the first attempt at the part (the one covered in putty stains) to the second which is made of a styrene that's half the thickness and much less jagged and wonky so far. (The grooves up top are a bit exaggerated thanks to the pencil marks on the edges of the styrene pieces.) My first design was hollow to be completely hollow so I could sneak a TCS DP5X decoder in the middle, but I'll probably cover the opening in the locomotive roof, add inner walls to the two electrical boxes, and just put an MC4 in the locomotive now that I've seen how well a decoder can fit in the body of an AEM-7. The three parts I'm missing to finish up my roof are those screws now that I've seen good shots of the resistor grids, the side details on said grids, and a little more work to the battery boxes since I'm making totally new parts. (Plus some more super glue as I just ran out.) Since they're such funky pieces, I'm trying to find ways to easily put everything together with as few gaps and as little post-assembly sanding as possible.
Yeah, I can see why you're having problems with the boxes! You should leave them hollow (room for plenty of lead weight in there), but it makes sense to put at least a backing of some kind behind the mesh, since these aren't see "all the way" through anyway. By adding these down the length of your box, you not only prevent the light from shining through, but you also give it strength.
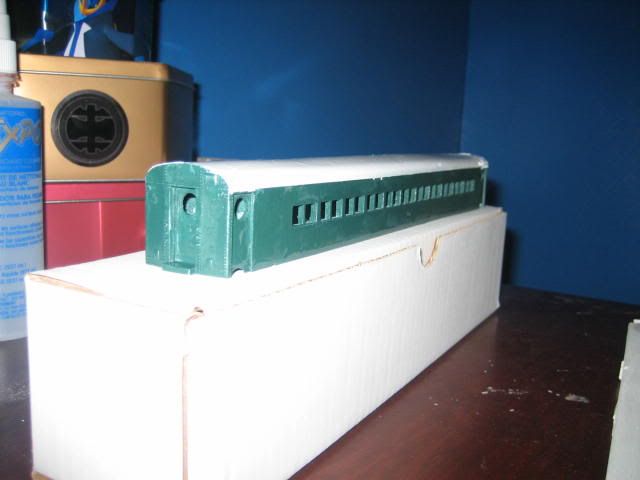
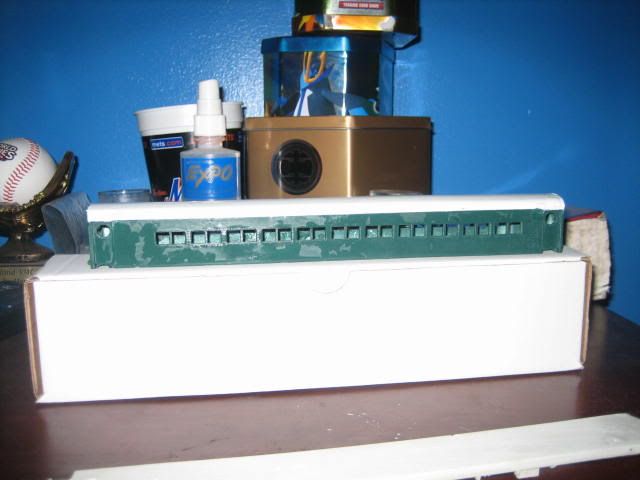
Here is a photo of what i have built so far-


Also, another thing i noticed is that you tried to make the angled vent on the "putty" box all open. I would not recommend this. It makes it annoying and complicated to make separate back pieces. I'd make it all one wall. Not only is it stronger, but it gives you a starting point. In fact, i made several "boxes" attached to the same sheet of styrene that made the roof.

I also used incredibly thin styrene to make that center "strip" down each box. I left extra hanging on each end and bent them to approximately the correct angle. then i used glue to hold the strip not only in place, but at the correct angle. I then used the excess material to make the "sides" of the angled vent, just gluing a strip to it, then using flush cutters to take off excess material, finally hitting it with the files and fine grit sanding paper until it was smooth. On mine, i bashed it by accident, but then again, i should have (and will now) fill it in with either putt or Gap filling CA so that it becomes a solid piece.


Also, depending on which locomotive you're doing, you might need the "Danger: High Voltage" and "Authorized Personnel" decals. I'm working on an AEM-7 Supplement Decal Sheet with a few weird things that can't be gotten from other decal sets like properly-sized Amtrak logos and enough numbers for Phase IV AEM-7s, little Helvetica Amtrak logos in Pantone 302C that go on the small sideboards for the Phase V AEM-7s, and the above mentioned decals that were on practically every AEM-7 and E-60MA yet have never been produced in HO scale.
Now, to go finish playing Santa Jr. and wrapping Christmas presents!
Once again, you're gonna have to set me up. Merry Christmas to you!
Elite Juice Jack Modeler.


