• The Not-Quite-Model-Railroad...

  • Discussion related to everything about model railroading, from layout design and planning, to reviews of related model tools and equipment. Discussion includes O, S, HO, N and Z, as well as narrow gauge topics. Also includes discussion of traditional "toy train" and "collector" topics such as Lionel, American Flyer, Marx, and others. Also includes discussion of outdoor garden railways and live steamers.
Discussion related to everything about model railroading, from layout design and planning, to reviews of related model tools and equipment. Discussion includes O, S, HO, N and Z, as well as narrow gauge topics. Also includes discussion of traditional "toy train" and "collector" topics such as Lionel, American Flyer, Marx, and others. Also includes discussion of outdoor garden railways and live steamers.

Moderators: 3rdrail, stilson4283, Otto Vondrak

  by NellsChoo
 
Hi all

Well, my Not-Quite-Model-Railroad has taken a very small step forward... sort of...

As stated on the past, I only have a small loop of flex track right now. I finally tried my hand at ballasting, and now have about ¾ of the loop “rockified”. I find it very difficult to clean the track of glue and goo, though, as my Bright Boy seems to take half of it with it! My engines still seem to want the track cleaner. Not a fun task…

The tiny giant step forward is that I finally made myself buy some track for my actual layout! Yes, I headed down to Ken’s Trains in Sudbury MA, chose some bits, and home I went… wondering what to DO with it all!!!

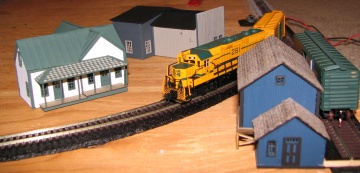
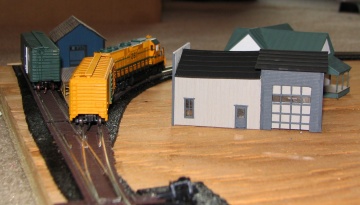
I have 7 lengths of Atlas code 55 flex track, one each #5 Left, #5 Right, #7 Left, #7 Right turnout, an angled crossing, 4 sprung Caboose Hobbies manual switches, two sets of feeder wires, and metal joiners. They were out of insulated joiners. Now that I have an a/c up in the attic, I sat down and put together a test group of track consisting of one #5 turnout and 3 short sections of track. I finally had a boxcar changing directions! (GASP!) But under finger-power only…

This must sound silly to all of you. But keep in mind I just can’t get myself to really delve into this project. The benchwork and wiring are really intimidating me. I don’t feel like working with power tools and stuff… In my youth, I’d have done it, but now I have no patience… or time. Wiring scares the daylights out of me, especially when a nice N scale engine usually sets me back $70 or so. If I fried one, I wouldn’t be happy…

So anyhoo… I am one step towards an actual model railroad… one SMALL step!
  by Komachi
 
NellsChoo,

Just remember the words of Neil Armstrong upon setting foot on the lunar surface...

"That's one small step for man, one giant leap for mankind."


And the old Chinese proverb...

"The journey of a thousand miles begins with a first step."


It may seem like a minor thing to get your track and start figuring out a track plan, but it's an important first step nonetheless. I hope you figure out a plan that suits your tastes and meets your operating requirements.

Just remember one thing...


MODEL RAILROADING IS FUN!!!!!!!!!!!!!


(Didn't a magazine once embrace that philosophy?) So, don't stress over your track plan, or whatever small steps you're taking to get to a point where you can operate trains. This hobby's all about enjoyment, remember that (hey, I need to remind myself of that every now and then!).

So, congratulations on your first step towards a layout, and I (as well as everyone else) look forward to hearing about things as you progress with things.

  by jmp883
 
NellsChoo,

It isn't that bad......and remember, you don't learn if you don't try. You may want to wait a day or two after ballasting before you clean your track to make sure the ballast is fully set. You may also want to readjust the amounts of ballast and bonding agents you're using. If it's any consolation I've had the same experience, but the solution is easy.

Wiring is easy. You can make it even easier on yourself if use Atlas electrical components. All my layouts over the years have been wired for multi-train operation. I've wired them using the traditional way (building a control panel, buying toggle switches, and then stringing wire out to each block, track switch, etc) and also using Atlas components. Both work equally well. If wiring seems beyond your reach at the moment look into the Atlas components.

As for benchwork you can build your layout on a sheet of plywood or hollow-core door. My current layout is on a door for portability since I'm probably not living in my final residence just yet. If you want track grades (up or down) you can use a jigsaw to cut just along either side of the track and then support the track with risers. Look in the model magazines, there is modular benchwork available where you buy and bolt it to the walls of your railroad room and then build your layout from there. That may be a viable option for me. I hate woodwork, I don't possess carpentry skills at all, even after years of trying, and thoroughly despise anyone who can do woodwork. The modular benchwork is something I'm seriously looking into when I'm finally able to build a permanent layout. Go to www.sieversbenchwork.com for more information on that.

Don't let your weaknesses or perceived inabilities keep you from getting into this hobby. I've been modeling in both HO and, now N, since I was about 5 years old and have learned many new skills (except for that damned woodwork!!).

  by NellsChoo
 
Words of confidence! :-D Thanks all!

I think one thing that is delaying my really working on a first layout is failure. I'm hard on myself when I goof. When I built car models, I would get depressed if they didn't come out perfect. Even after winning two MASSCAR model awards, I just stopped building. Not a good excuse, I know...

Car model magazines and model railroading magazines have something in common: they all show the GOOD models, or the GOOD layouts. You rarely see beginner's work, or something sloppy. I guess you're supposed to aspire to the level of great work they show you, but BOY does it bruise the ego!

I've looked into the pre-cut benchwork kits, but they are a bit pricey for me right now. If you don't have benchwork, how do you run your wiring? By that I mean if you can't drill holes and run wires underneath, do you run them along the top on the layout? Probably only something a beginner would do, huh? As stated, I bought manual switch throws, so I don't have to worry about wiring switch machines.

JD

  by jmp883
 
Since my layout is built on a hollow-core door I drill holes from the track switches and track blocks and route the wires to the underside of the door. There the wires are bundled underneath the layout. I use cable ties to bundle the wires together and adhesive-backed tie-downs and cable ties to secure the bundles to the underside of the layout. Wiring accessories like tie-downs and cable ties can be found at Radio Shack.

  by stuart_iowa
 
if the wiring scares you that much, go to your local hobby store, see if they have the wiring layout guide books,
they should have them for DC and DCC, if you have other problems, keep your layout simple, no wyes, no reverse loops till you learn the basics of wiring.
if you do mange to short something chances are your power pack will over laod before you fry a loco so you can relax.

tools you will need
volt meter, pilers, wire cuters, solder, soldering gun or iron, masking tape and magic marker, and wire

the tape is tage your wires so you know it what it is for

if your planning to run one or more locos on dc system, you block controls, insulated rail joiners, etc,

i always have done dc , have no clue about dcc, someday i will know more about dcc


when i first start building my layouts i always decide where the power pack is going first, then i put the power track in place, and hook it up to the power pack and slowly start to lay track ( am not a cork person) making sure that power is running thru the track as i go so i can watch the over load light. I now use my digital volt meter to check each section for power and add feeder wires as needed.

after I am happy with how it works and have the little bugs worked out i put in my insulated railjoiners to make my blocks, put one section in at a time. make sure it works and see what changes it made to the rest of the layout, check all sidings and other track work to see if I have power every where i want it. then move on to the next section and so on

once you start with the basics it will come to you how to do it, just go slow
is all i can suggest

  by NellsChoo
 
Well folks, I took some of that new track and found out it's far easier to cut with real rail cutters! :wink: I took a turnout out of the packaging, cut some rail, and suddenly I had a real turnout! Last night, I decided I just HAD to try to power this little setup. What resulted was confusion.

I only had one set of lead wires hooked up, yet the engine I decided I could do without if I blew it up worked no matter how the turnout was set! I thought I'd have to add more fedder wires to make it work.

Soooo, not knowing just why it worked, I decided my little loop of track should have a siding. I ripped out a small section, added the turnout and a short siding, and sure enough, it all worked. I had trouble with the Caboose ground throw, though. But for now, while not pretty, it all works.

But I don't get why I don't need to add more wires!!!

????????????

  by green_elite_cab
 
for dual cab control ( better known as block wireing) if youy want to run more trains than one without DCC, you need to eletricaly seperate an area of track from the rest of the layout.

wireing isn't hard, and as long as your careful you won't get yourself with the soldering iron. you might not even need to solder.

by an atlas controller, it will be a black pannel with 4 green electrical switches. look on the back of the box it comes on for clear directions.

if you only want to run one train thats fine.

also, some switches you can buy reroute power to whichever way the switch is thrown, so you may need to add feeders if the switch is thrown away from where your locomotive is.

chances are you wont' fry your locomotive if you are useing a regular power pack, and you aren't shorting the track out. wireing is easy, and benchwork is annoying, but you can get a 4x8 table done in 2 days. i had no idea how to use power tools when i started, and i was done in 2 days.

  by NellsChoo
 
Hmmm... so maybe when I throw this switch I installed (OK, turnout), it is actually re-routing power to the track the engine is rolling onto?

  by green_elite_cab
 
no not neccisarily. only some swithes ( usualyt he more high end switches) do this. my atlas switches work whichever way the points are thrown, no matter where the locomotive is.

  by GOLDEN-ARM
 
This might seem "simplistic", or you might already be familiar with them, but ATLAS has several excellent books, on building small layouts, that guide you every step of the way, from constucting a table (using minimal tools) to track laying, ballasting, wiring, adding scenery, etc. The books are layed out in a very straight-forward manner, with accurate descriptions showing all aspects of the construction, simplified wiring, and testing your wiring without "letting the smoke out" as a youth, I went through several "layouts" before being given an ATLAS layout book. I never looked back, and I had a few nice layouts, each on larger, and more complex, than the last. Your layout is in the attic, so why the fear of how it will look ? Build it to suit yourself. This is supposed to be fun, not something to "beat yourself up over" :-D If you are your own worst critic, then "lighten-up", and enjoy what makes you happy. That A/C in the attic shows you are commited to doing this, so don't give up. read some books, get some magazines, and most of all, don't be afraid of failure, or non-perfection. (in the real world, there is NO such thing as perfection, anyways) GOOD LUCK, regards :wink:

  by NellsChoo
 
Oh, I read... and read and read! If I can't sleep, I sit in bed flipping through magazines and books. But I still am slow to really jump into things. After almost mastering model car building, it feels silly and rather upsetting that I should a) be so burnt out b) need to learn a hobby all over again.

Below are two shots of the NQMRR. They are just a little mock-up showing my new little siding, and recently finished garage building. The buildings will someday be totally finished once I know where and why they will be used.

Image
Image
  by Komachi
 
(The Inuyasha-esque looking member in the moderators' boxes stands and applauds loudly.)

GANBATE!!!!!!!!! (A Japanese term of encouragement that has a variety of positive meanings; "Do your best!" "Don't give up!" "Good luck!")

  by Otto Vondrak
 
Image

Hrm.... and we're watching just a little too much Adult Swim, maybe?

Keep it up Jonelle, keep us posted to your progress.

-otto-

  by jmp883
 
Here's something that just came in my e-mail. These may help:

http://store.yahoo.com/kalmbachcatalog/ ... nners.html

Check the last 4 titles. They're new books on specific topics. Might just be worth looking into.