Railroad Forums 

  • Double decker layouts

  • Discussion related to everything about model railroading, from layout design and planning, to reviews of related model tools and equipment. Discussion includes O, S, HO, N and Z, as well as narrow gauge topics. Also includes discussion of traditional "toy train" and "collector" topics such as Lionel, American Flyer, Marx, and others. Also includes discussion of outdoor garden railways and live steamers.
Discussion related to everything about model railroading, from layout design and planning, to reviews of related model tools and equipment. Discussion includes O, S, HO, N and Z, as well as narrow gauge topics. Also includes discussion of traditional "toy train" and "collector" topics such as Lionel, American Flyer, Marx, and others. Also includes discussion of outdoor garden railways and live steamers.

Moderators: 3rdrail, stilson4283, Otto Vondrak

 #66476  by snowplough
 
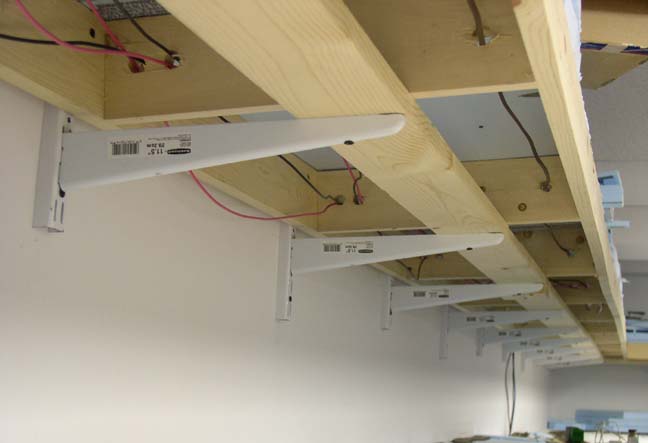
For a long time, I've been prejudiced against multilevel layouts, because I felt that that there just wasn't enough separation between the levels (usually) to do justice to wide views of the lower level. Recently, however, I have been working on a friend's layout which will eventually be multilevel, and I have begun to change my mind--to think that two levels can be done in a way that's aesthetically pleasing, especially if the upper level protrudes far less than the lower level. I've come to see it as a possibility for my own layout (yet to be built).

What are others' opinions? I'd especially like to hear from those for whom overall ("wide-angle") aesthetics has some bearing. Is there a magic number of inches of separation between the layers that makes it work (both vertically, and in how much more abbreviated the upper level should be horizontally)?
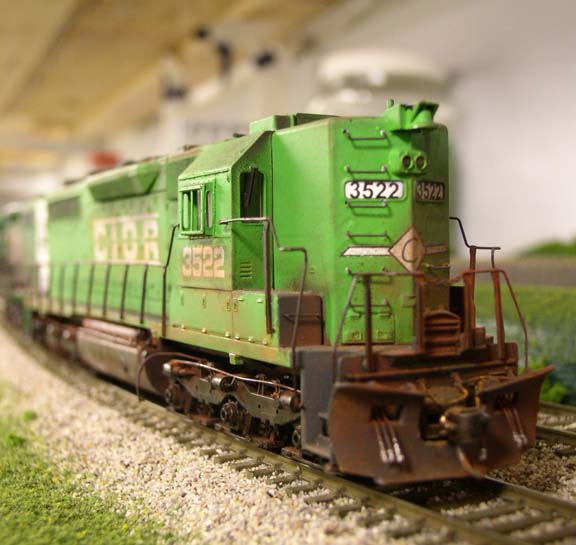

snowplough

 #66654  by CIOR
 
At first I wasn't a fan of this concept. I felt that it was just stacking more on, and ruined a good thing.
This view changed however once I started planning the current CIOR.
I needed as much mainline as I could get, and stick inside my "limits of design". I didn't want a layout that filled every single inch of the basement, rather I wanted something that clung to the walls and for the most part, stayed out of the way.
What I ended up with was a multi-deck layout. For the most part, the layout is only 2 decks, but about 1/3 or so is 3 deck. The lowest deck is the yard, it permits switching from a seated position. The middle deck is the first of the mainline, it is at waist level and sticks out 2'. The upper deck is shoulder to chin high, its mostly 16" deep, but a small segment of 2' to allow switching and more industry.

Overall, I am pleased, once I have the facia on the upper deck, I feel it will help give it a finished easy on the eye look.

The one drawback, look at this picture, you can see that taking surface level shots will yield a "look at the underneath side of the upper deck" feel. This is something that with a little better camera placement or photo shop work, could be contained and made to look better.
Image

Also, when I built the viaduct scene, I had to lower it from the standard level, it being on the upper deck, this made a more compressed view for things.
In this shot, you can see the upper deck, the spacing and so forth.
(YES! I know the signal is leaning, its not in its final resting place... :P )
Image
 #66741  by Mike Roque
 
CIOR,

I must say that I'm very impressed with your layout. I know it isn't done, but the basic scenery that you have in place (Ground foam, ballast, signals, etc.) look excellent and "clean". I also like all the info on your web site, especially the photos, roster, and track plans.

 #66873  by CIOR
 
Thanks for the complements on the layout.
Hopefully over the next few weeks a larger segment in the lower deck will get done with basic scenery. If it does, I will get more pictures.

 #67113  by snowplough
 
I like the pictures, too, CIOR.

I have a question: What sort of brackets (or whatever) do you use to support the upper level? I don't see any in the pictures.


snowplough

 #67228  by CIOR
 
I used a very EXPENSIVE method! (I justified its expense, because it can be reused over and over and over again).

I went to Lowes and purchased Rubbermaid shelving bracket system. This is the type that is adjustable, as you can see by the photo. I took and cut down the bracket holders (they come in lengths all the way to 8 feet IIRC) and I cut them down with my sawzall with a metal blade, then drilled new holes where needed for 2-1/2" screws to be put into the studs.
The shelf supports are 11-1/2"

(this is a pre backdrop picture)
Image

Then once I have the benchwork up and attached, I then added 1/4" hard pressboard that is cut down to fit the area between levels. I treated this like drywall, filled screwheads and taped joints, then painted it a light skyblue.
This helps hide as much of the supports as possible.

(this is a post backdrop picture)
Image

 #67232  by CIOR
 
I guess I need to add this.

I have seen some use the nice L-bracket type hangers to support the layout with. The reason I didn't use this method, I wanted something that could support the weight, and I didn't feel that the L-brackets could support it.
Now, if you did your upper deck out of foam, then you can easily get away with it.
All the decks of my layout are hung with the heavy duty system. It allows a clean look.
I attached the 1x4's to the studs above the brackets, and also ran a 1x4 along the front of the brackets to tie it all together (overkill).

I probably have 60+ hangers, plus the racks too. But I wouldn't change the way I did this layout, as it is very solid.