by AntonioFP45
Hi guys,
In advance, please forgive some of the blurry photos.
The subject here is an HO GMC Transit "Fishbowl" bus from Busch. I've always been a big fan of these buses as they were always a part of my childhood and youth years. As a kid, I often rode the prototypes with my mother in NY and worked on them as a young adult at a transit authority. They were built factory tough and many of them racked up millions of miles, individually. Anybody remember the movie "Speed"?
Busch did a nice job on these and for the price they're hard to beat. There are 3 issues that I have with them; two of which are easy to fix.
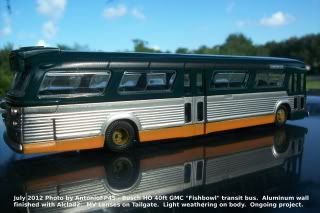
1. The dull silver finish of the corrugated "aluminum" sheet metal is unrealistic.
2. The painted-on red tail lights.
3. The Condenser Fan Motor cover (roof spoiler) is about 4" too narrow.
Instead of completely redoing the coach, I decided to try the "Work with what you got approach" on this unit and freshen it up a bit without spending a lot of time on it. It's not finished yet, as it needs additional lenses and more weathering (and mirrors; Grrrr!). Like my first unit, I wanted to alter the color scheme to a freelanced version that's in my head.
BTW: I don't know how or where I put them but I can't find the mirrors for both of the buses, lol! I have many storage trays but I likely stored them in the wrong one. I'll probably find them when I'm not looking for them. :-/
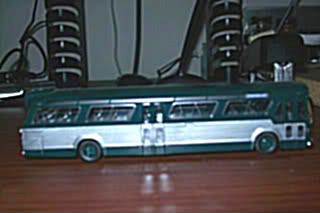
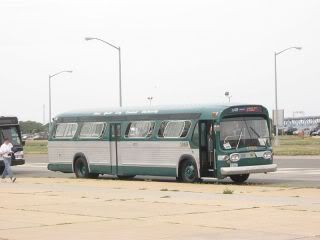
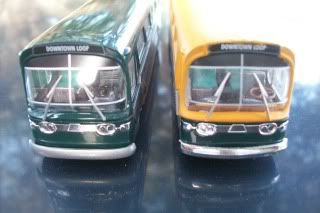
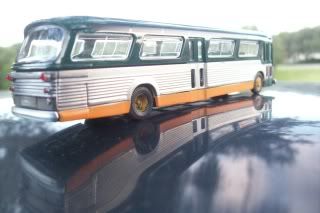
Here is the bus in stock form and a photo of a prototype:
For those wondering, here's an easy guide that shows with photos how to take apart one of these buses.
http://www.barp.ca/bus/models/buschdisa ... index.html
One thing, though. Instead of a knife to remove the bottom, use a slim flat blade screwdriver. The bottom pops off with minimal effort.
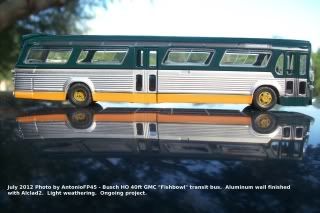
After disassembly, I painted the bottom skirt panel a custom mix of Polly Scale CSX yellow and SCL Caboose Orange, allowed it to cure, then masked it off. I also took the tires off, and simply wet-coated the wheels with the paint mix. I wanted to the stock green to show through to give the effect of some grime and paint chipping on the wheels.
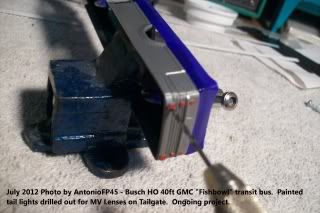
Next, I slowly drilled out the tailight lenses starting with slim drill bits and finishing with larger diameter bits. I would never recommend a Dremel for this. The Pin Vise is much easier to control:
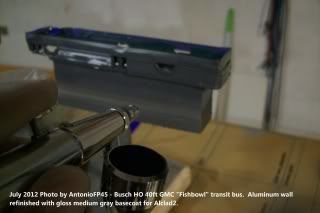
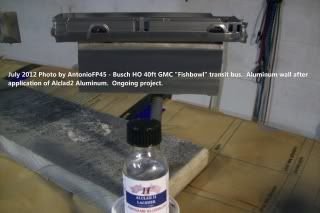
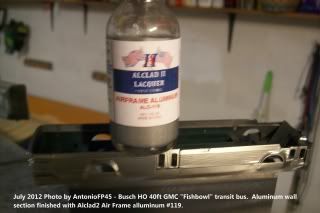
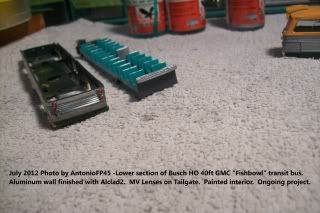
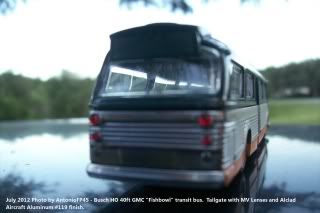
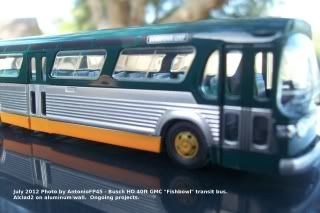
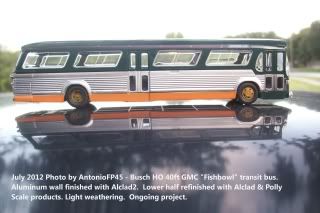
After cleaning out the residue from the lens housings, I carefully wiped off the wall section with isopropyl alcohol several times on a dampened cloth. Next I airbrushed 2 very thin wet coats of medium gloss gray and allowed to cure. Followed up with thin mist coats of Alclad #ALC 119 Airframe Aluminum.

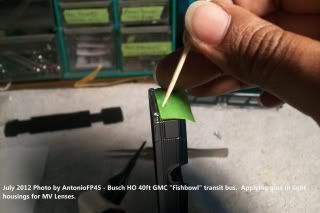
Next, I put the now-Alcladded lower section back in the vise in a vertical position (good idea to apply cloth or masking tape on the jaws of the vise). I next applied "Zap-a-Gap" gel CA adhesive inside of each tail light /brake light housings with a tooth pick. Then carefully picked up each lens and installed. The gel adhesive allowed me enough time to move the MV Lenses around into position. For me, this was the most tedious part of this process.


Interior
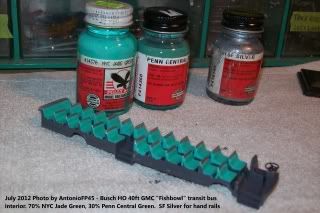
I remember well that odd aquamarine-green that the NYC Transit authority had in many of their fishbowl buses. Although I'm not modeling the NYC TA I still wanted to capture that basic appearance. I made a mixture of Polly Scale NYC Jade Green 70% with Polly Scale Penn Central Green 30%. To imitate the semi-polished steel grab rails mounted on the seats, I painted the top section Polly Scale Santa Fe Silver.
Bumpers:
I applied thin coats of clear on the rear bumper of this bus to dull it down a bit while I refinished the front bumper to a duller appearance. From my experience the the front bumper dulls more quickly, while the rear bumpers (inspite of the heat from the engine) seem to keep their reflectivity longer (although in New York they were often banged up from tailgaters.....just like today's buses!
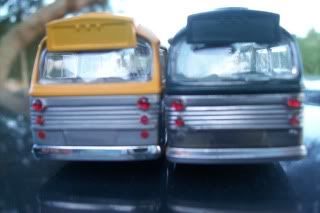
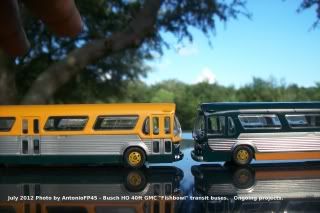
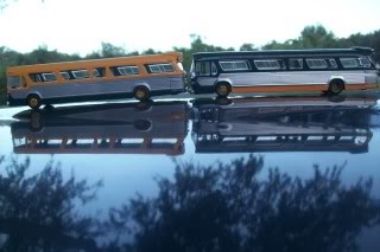
I reassembled the unit and took a few shots, including some of my first Busch bus. Notice the stock silver finish of the Yellow fishbowl compared to the unit with the Alclad finish. Both buses have MV Lenses on the rear.
I ran out of MV Lenses so I could not do the bottom lights.

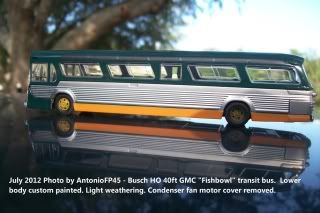
Here are a few shots with the Condenser Fan Motor Cover (spoiler) removed as it lifts off easily. Many prototype units originally came in this version, with the motor mounted underneath the coach. If you want to model that version, fill in the hole with styrene and body putty. Primer, then paint to match. I plan on purchasing another unit and doing it in that version.
Quick Notes:
A. The MV Lenses I used were slightly oversized. For the brake lights (large) use MV LS-281 instead of LS-200, which is what I used. For the smaller lights MV #220 works nicely.
B. You can alter the Aluminum's appearance (lighter, darker) with the basecoat, just as with passenger rail cars. BTW: Don't use gloss black for the basecoat, use use gloss gray.
I hope that this thread is helpful. I still have a ways to go in finishing both of these buses but imho, a little "sprucing up" like this can really make one of these classic transit workhorse stand out in a city or town scene.
In advance, please forgive some of the blurry photos.
The subject here is an HO GMC Transit "Fishbowl" bus from Busch. I've always been a big fan of these buses as they were always a part of my childhood and youth years. As a kid, I often rode the prototypes with my mother in NY and worked on them as a young adult at a transit authority. They were built factory tough and many of them racked up millions of miles, individually. Anybody remember the movie "Speed"?
Busch did a nice job on these and for the price they're hard to beat. There are 3 issues that I have with them; two of which are easy to fix.
1. The dull silver finish of the corrugated "aluminum" sheet metal is unrealistic.
2. The painted-on red tail lights.
3. The Condenser Fan Motor cover (roof spoiler) is about 4" too narrow.
Instead of completely redoing the coach, I decided to try the "Work with what you got approach" on this unit and freshen it up a bit without spending a lot of time on it. It's not finished yet, as it needs additional lenses and more weathering (and mirrors; Grrrr!). Like my first unit, I wanted to alter the color scheme to a freelanced version that's in my head.
BTW: I don't know how or where I put them but I can't find the mirrors for both of the buses, lol! I have many storage trays but I likely stored them in the wrong one. I'll probably find them when I'm not looking for them. :-/
Here is the bus in stock form and a photo of a prototype:
For those wondering, here's an easy guide that shows with photos how to take apart one of these buses.
http://www.barp.ca/bus/models/buschdisa ... index.html
One thing, though. Instead of a knife to remove the bottom, use a slim flat blade screwdriver. The bottom pops off with minimal effort.
After disassembly, I painted the bottom skirt panel a custom mix of Polly Scale CSX yellow and SCL Caboose Orange, allowed it to cure, then masked it off. I also took the tires off, and simply wet-coated the wheels with the paint mix. I wanted to the stock green to show through to give the effect of some grime and paint chipping on the wheels.
Next, I slowly drilled out the tailight lenses starting with slim drill bits and finishing with larger diameter bits. I would never recommend a Dremel for this. The Pin Vise is much easier to control:
After cleaning out the residue from the lens housings, I carefully wiped off the wall section with isopropyl alcohol several times on a dampened cloth. Next I airbrushed 2 very thin wet coats of medium gloss gray and allowed to cure. Followed up with thin mist coats of Alclad #ALC 119 Airframe Aluminum.
Next, I put the now-Alcladded lower section back in the vise in a vertical position (good idea to apply cloth or masking tape on the jaws of the vise). I next applied "Zap-a-Gap" gel CA adhesive inside of each tail light /brake light housings with a tooth pick. Then carefully picked up each lens and installed. The gel adhesive allowed me enough time to move the MV Lenses around into position. For me, this was the most tedious part of this process.
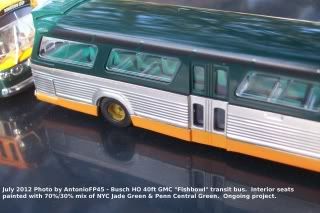
Interior
I remember well that odd aquamarine-green that the NYC Transit authority had in many of their fishbowl buses. Although I'm not modeling the NYC TA I still wanted to capture that basic appearance. I made a mixture of Polly Scale NYC Jade Green 70% with Polly Scale Penn Central Green 30%. To imitate the semi-polished steel grab rails mounted on the seats, I painted the top section Polly Scale Santa Fe Silver.
Bumpers:
I applied thin coats of clear on the rear bumper of this bus to dull it down a bit while I refinished the front bumper to a duller appearance. From my experience the the front bumper dulls more quickly, while the rear bumpers (inspite of the heat from the engine) seem to keep their reflectivity longer (although in New York they were often banged up from tailgaters.....just like today's buses!
I reassembled the unit and took a few shots, including some of my first Busch bus. Notice the stock silver finish of the Yellow fishbowl compared to the unit with the Alclad finish. Both buses have MV Lenses on the rear.
I ran out of MV Lenses so I could not do the bottom lights.
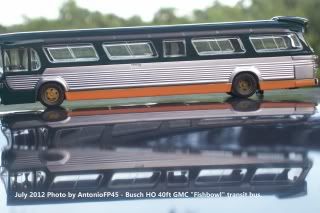
Here are a few shots with the Condenser Fan Motor Cover (spoiler) removed as it lifts off easily. Many prototype units originally came in this version, with the motor mounted underneath the coach. If you want to model that version, fill in the hole with styrene and body putty. Primer, then paint to match. I plan on purchasing another unit and doing it in that version.
Quick Notes:
A. The MV Lenses I used were slightly oversized. For the brake lights (large) use MV LS-281 instead of LS-200, which is what I used. For the smaller lights MV #220 works nicely.
B. You can alter the Aluminum's appearance (lighter, darker) with the basecoat, just as with passenger rail cars. BTW: Don't use gloss black for the basecoat, use use gloss gray.
I hope that this thread is helpful. I still have a ways to go in finishing both of these buses but imho, a little "sprucing up" like this can really make one of these classic transit workhorse stand out in a city or town scene.